Inspections
The inspections view shows all planned, completed or cancelled tasks or inspections.
To understand the relationship of tasks and inspections, please read our knowledge base article
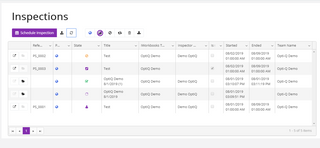
You can either plan an inspection via the iCL Portal via a task or directly start it with the iCL Filler via an iWorkbook.
An inspection passes through the following states:
| Symbol | State | Description |
|---|---|---|
 | New | An inspection has been created as a task but not assigned to any inspector. In this state you can delete an inspection. |
 | Assigned | An inspection has been assigned to an inspector. It is still editable |
 | In progress | The inspector has started his/her inspection in iCL Filler. In this state you can cancel an inspection, but you cannot edit it anymore. |
 | Complete | The inspection has been completed successfully; data and reports have been sent to the iCL Portal. |
 | Cancelled | The inspector has declined a task or cancelled an active inspection. In this state you can re-assign an inspection to a different inspector. It will then switch to the assigned state. |
You can select one or more inspections/tasks and use the following commands:

| Symbol | Description |
|---|---|
 | Enables you to import a task using a single task template or a bulk task template. |
 | Refreshes the list. |
 | Publishes the selected task. Only published tasks are visible to assigned users. |
 | Unpublishes the selected task. |
 | Cancels an started inspection. |
 | Reassigns an inspection to another inspector. |
 | Deletes an inspection or task. Beware this deletes all data collected during an inspection. Use with caution! |
 | Downloads an iCLr file including data of a completed inspection. |
 | Synchronizes a completed inspection which was already removed from the users devices for 7 more days to the selected user(s) - mostly for duplication purposes. |
Planning Inspections
You can plan inspections in the iCL Portal. You have two options to create a task.
Creating a Task via the iCL Portal
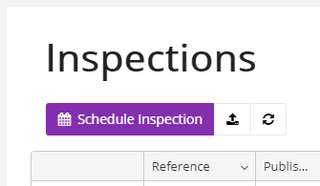
Select 'Schedule inspection' to create inspections in the respective team. To be able to send an inspection to iCL Filler, you must assign it to an inspector and an iWorkbook, which must also be available in the team.
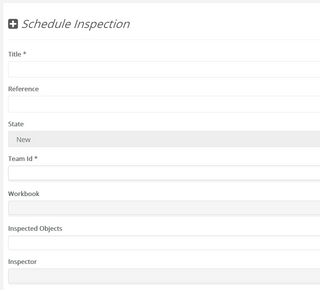
If you are scheduling an inspection from the 'Inspections' menu from the navigation bar, you additionally have to enter the team of that inspection. Scheduled within a team, this field is not visible.
Additional fields that were defined as 'Assignable from Task' in iCL Designer are not shown here and must be filled in via a separate Excel sheet.
When all required information is given, the task can be created by pressing the 'create' button in the bottom of the form.
Creating a Team Task
A task can be made as a team task by checking 'is self-assignable'. A team task is assigned to all inspectors within a team. So all inspectors of a team can grab the task and perform it. Nevertheless, this task can also be assigned to a specific inspector. In this case the created task will also be visible for this inspector in the iCL Filler under Tasks also in the 'Assigned to me' view.
Other team members will see this team task in the iCL Filler under Tasks in the 'Available to self-assign' view.
Import a Task via Excel
You can import pre-filled inspection data and answers of questions into a task via an Excel sheet using an iCL task template. You can import several tasks at the same time with it. For each workbook the corresponding template can be created using 'bulk import' command.
The template will already have columns for the fields which are marked as 'assignable from task'.
Columns of the template
The sheet must contain all of the following columns, except isselfassignable and itemstoinspect, even if you leave their cells empty. If a column is missing, the whole file is rejected with "the following columns were missing in the spreadsheet: ...". Column names are not case-sensitive, but keep them exactly as they are in the template: do not rename, translate or add spaces to them.
| Column | Value required? | If the cell is empty | Allowed values |
|---|---|---|---|
reference | yes | - | Your own unique identifier of the task. This is the task's external id - the same value the REST API calls externalId. It must be unique within the file and must not exist in iCL Portal yet: the import only creates new tasks, it does not update existing ones. |
title | yes | - | Title of the task. |
ispublished | no | the task is not published | An Excel TRUE/FALSE value, the text true/false, a number (0 = no, any other number = yes) or yes. Any other text, such as no or x, also means not published. |
timezoneoffset (hrs) | no | the dates are imported as UTC | Whole hours, e.g. 1 or -5. See Dates and time zone. |
startdate | no | no start date | An Excel date. Must not be later than duedate. |
duedate | no | no due date | An Excel date. |
inspector | only for published tasks that are not self-assignable | the task is not assigned | User name, e-mail address or numeric user id. See Inspector. |
isselfassignable | no | not self-assignable | Same values as ispublished. Creates a team task. This column is optional. |
customer | no | - | Free text. See Customer and location. |
location | no | - | Free text, e.g. the site address. See Customer and location. |
description | no | no description | Free text, at most 500 characters. |
workbook | for published tasks, and when you fill a column of an 'assignable from task' field | no iWorkbook | The template fills in the id of the iWorkbook. Instead, you can also enter its title or name (case-sensitive). The iWorkbook must be assigned to the team. |
minimumworkbookversion | no | any version | Whole number. The row fails if the latest version of the iWorkbook is lower. |
team | yes, unless you upload the file within a team | the team you uploaded the file into | The title of the team. If you upload the file within a team, all tasks must belong to that team. |
itemstoinspect | no | - | Only present if the iWorkbook has an inspectable content type. Ids or references (external ids) of content items, separated by commas. |
| one column per 'assignable from task' field | no | - | The value pre-fills the field of that name in iCL Filler. |
A published task needs an iWorkbook and must either have an inspector or be self-assignable. Otherwise the import fails.
Only the first worksheet is read, and reading stops at the first completely empty row.
Inspector
The inspector column identifies the user by one of:
- numeric user id: a value that consists of digits only is always treated as an id. If a user name consists of digits only, enter the e-mail address instead.
- e-mail address (not case-sensitive)
- user name (not case-sensitive)
The full name of the user is not accepted. The user must be an inspector in the team of the task, otherwise the row fails with "Inspector is not member of team ...".
Dates and time zone
Dates in Excel have no time zone, but iCL Portal stores all dates in UTC. timezoneoffset (hrs) tells the import in which time zone the startdate and duedate of that row are given, as the offset to UTC in whole hours - for example 1 for Central European Time and 2 for Central European Summer Time. The import subtracts the offset: 08:00 with offset 2 is stored as 06:00 UTC.
If you leave the cell empty, the dates are imported unchanged, i.e. as UTC. The offset is used for nothing else and is not stored with the task.
Only whole hours are supported. A number with decimals such as 1.5 is rounded to whole hours. A text such as +01:00 is ignored without an error message, and the dates are imported unchanged.
Customer and location
The import saves customer and location with the task, but neither iCL Portal nor iCL Filler displays them. To show such a value to the inspector, add a field marked as 'assignable from task' with the name Customer or Location to the iWorkbook: the import then pre-fills that field.
Errors
If anything in the file is wrong, no task is imported. Errors in individual cells are added as comments to these cells, and you receive a notification with a link to download the file. Correct the cells marked with a comment and import the file again.
Managing Inspections
Once an inspection has been successfully closed or a draft report has been created, you can retrieve the inspection results by clicking the open-folder icon.

You can access data from 2 different tabs:
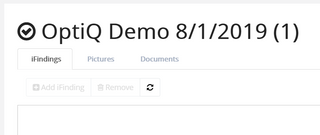
Pictures
The 'Pictures' tab contains all global pictures that have been added to iCL Filler. Pictures that have been attached to a checklist are not displayed.
Documents
The 'Documents' tab contains all documents that have been created with iCL Filler. Draft reports are overwritten by final reports after an inspection has been closed and both can be downloaded here.

Assign Inspections to another User
In iCL Portal, there is a new button "Assign/Delegate"
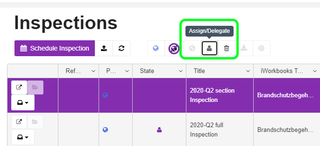
It allows you to assign an inspection to another user.
You can select multiple tasks and assign them to a new user in one action, as long as they belong to the same team.

This is because the dialog displays the list of all assignable users - which is basically the list of all the inspectors of a given team. You can assign a task if it is new, assigned, active or cancelled. If you assign a cancelled task to some other user, its state will be changed to "assigned".
This feature is especially helpful if an inspector started an inspection and then went on sick leave. The coordinator can then assign the inspection to another inspector. However, please ensure that the inspector on sick leave actually synchronized his iCL Filler app, so that the other inspector has all the latest data!
You can only assign tasks, if you are a coordinator or an administrator, so inspectors cannot delegate at the moment.
Re-open an Inspection
A completed inspection is locked - neither the inspector nor iCL Portal can change its data anymore.
If an inspection has to be corrected after it was completed, you can re-open it: it is set back to in progress, its task becomes active again and it is synchronized to the inspector's device.
Select one or more completed inspections and use the Re-open command.
All final reports of the inspection are deleted. They are created and sent again once the inspection is completed the next time - and the completion date changes. Reports that were already downloaded or sent by e-mail are not recalled.
Depending on your role, iCL Portal asks you two questions before re-opening:
| Question | Who is asked | Meaning |
|---|---|---|
| Do you want this re-open to increase the re-open count? | administrators, coordinators and developers | Yes, raise count and No, keep count decide explicitly whether the reopen counter of the inspection is raised. All other users do not get this question - for them the iWorkbook's grace window decides. |
| The re-open window has expired for the following inspections... | administrators and developers | The iWorkbook limits how long after the completion an inspection may be re-opened, and that period has elapsed. You can Re-open all, Re-open only non-expired or cancel. Users without those roles get an error instead and cannot re-open the inspection. |
An inspection can be re-opened in iCL Portal even if the iWorkbook does not allow the inspector to re-open it in iCL Filler. What you do need is the Reopen task permission. It is granted to team administrators out of the box; other roles can be given the permission in the role settings.
You can see how often an inspection was re-opened by adding the columns Reopen count and Last reopened to the inspection list. Both can be sorted and filtered like any other column.
Read Reopening inspections to learn how the reopen counter works, how it is configured in iCL Designer and how a checklist can react to it.
Resynchronize an Inspection
After 30 days of being completed, inspections are removed from the users devices to free up space. Sometimes, however, users would like to have an old inspection on their device - e.g. to use it as base for a reinspection.
The retention period of inspections and tasks can be configured in the settings and individually for each workbook in the workbook list.
This can now be done in iCL Portal:
- Login to iCL Portal
- select the completed inspection you'd like to have on your device and click Re-synchronize
- the system will show a success notification and the inspection will be available on your device for 7 more days

This feature can be used by administrators, coordinators and inspectors.
Inspectors can only resynchronize their own inspections, while administrators and coordinators can select an inspector that should receive the particular inspection.
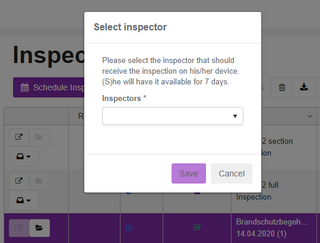
Only inspectors of the same team are available for selection.
Also note, that the selected user does not become the assigned user.