Introduction to content types
In the iCL system, data is stored in content items which are defined through content types. This guide will walk you through a basic scenario for creating and working with a simple content type.
Before you get started, read our knowledge base articles about content types. This guide builds on the knowledge provided in these articles.
We will continue working on the building inspection workbook from the previous guides,
💾 you can download if from here.
Our goal in this guide is to learn how to keep track of buildings that must be regularly inspected. Just imagine the following scenario: You lead a team at a building inspection company, your job is to manage the regular building inspections, keeping track of the buildings that your team inspects and assigning tasks to the building inspectors.
To learn how to do all that easily with the iCL product family, keep reading!
Create a building content type
The first thing that we want to achieve is storing the building informations. This is an important step in order to keep track of the buildings.
The first step is to create a content type for representing buildings in the iCL system. This content type will model a building with the following fields: a unique name to identify the building, address and optionally an image of the building.
You are now probably wondering why there is a separate "unique name" and an "address" field if the address is unique anyway? You can of course use the address as the building's name since it is unique. However, addresses are often very long and you may want to provide a shorter name for your user to easily identify the object.
Content types are defined in JSON files, you can find the knowledge base article about defining content type here.
The building content type with the above described fields looks like this:
  {
    "$type": "contentType",
    "name": "building",
    "displayName": "Building",
    "canBeInspected": true,
    "titleFieldName": "building_name",
    "icon": "",
    "fields": [
      {
        "$type": "contentField",
        "name": "building_name",
        "displayName": "Building Name",
        "isRequired": true
      },
      {
        "$type": "contentField",
        "name": "address",
        "displayName": "Address",
        "isRequired": true
      },
      {
        "$type": "contentField",
        "type": "FileEntry",
        "name": "picture",
        "displayName": "Picture"
      }
    ],
    "id": "216bf3e2-a3a1-4941-9e58-dccf79f2038b",
    "version": 1
  }
The most important things to note:
- The 'canBeInspected' property is set to
truebecause we want to allow inspectors to inspect buildings. - The 'titleFieldName' is the
building_name, therefore it is a required field. - The
addressis required as well for obvious reasons. - The 'type' property is defined only for the picture, because the other two fields are text field which is the default value.
That's it! We have a content type definition that can model a building. Let's upload it to iCL Portal and create a content item of this type!
Upload the JSON file to iCL Portal
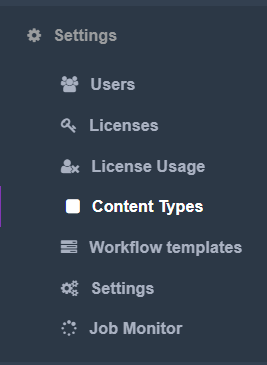
Log in to iCL Portal with your credentials and navigate to Settings > Content Types.
You can upload the file by clicking the Upload button or just drag&drop it to the area.
Create a content item of type building
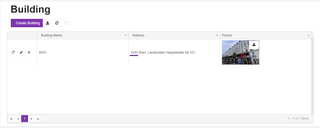
If the upload was successful, you should be able to see the specified display name of the given type (which is 'Building' in our case) in the Content menu.
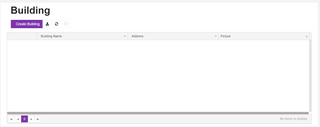
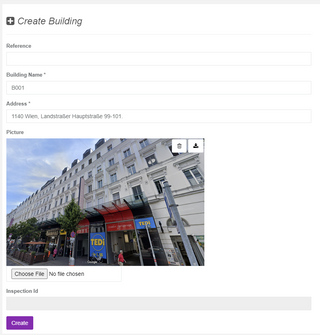
To create a building content item in iCL Portal, click the purple 'Create Building' button. Fill the (required) fields and hit 'Create'.
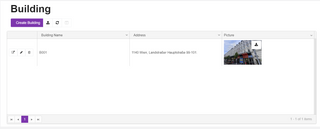
Going back to the list of buildings, you should now see the item that you just created.
Import the content type to the workbook
The next step is to import the content type and incorporate it into the workbook.
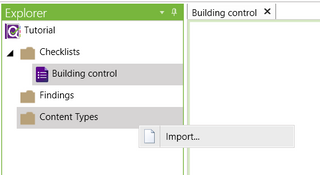
Open the workbook in iCL Designer and right-click on the 'Content Types' folder in the Explorer window on the left hand side. Then, click Import and select the JSON file.
Then, select the file in the Explorer window. It will open its properties on the right hand side. To allow the users to inspect items of this content type, select 'Is inspected' in the Properties window.
Now, let's create a field for the inspected building - its type will be 'Content Item'. Add it to the 'Building' headline and make it a readonly field.
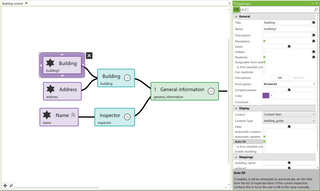
As you can see in the screenshot above, 'Automatic updates' and 'Auto fill' are enabled.
If 'Auto fill' is enabled, the inspected item(s) will be automatically loaded to the field in iCL Filler.
'Automatic updates' allows you to update the data of the content item using its mappings.
Automatic updates using mappings
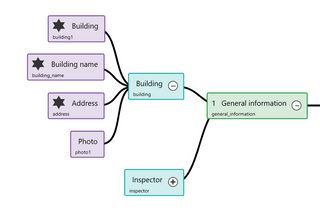
The building content type has 3 fields: name, address and a picture. Let's create questions corresponding to these fields (the address field already exists).
Note, that the picture is not a required field in the content type definition, therefore the image field should also not be not mandatory.
We want to load the data from the content item to these fields. To do so, we have to create a Blockly script for each question's scripted answer where we use the corresponding content item field.
For example, the 'Scripted answer' of the address field looks like this:

In this way, we have ensured that the data is loaded from the content item to the checklist. However, you may want to update the value of some of these fields, for example the photo, because the building has been repainted. How will this new photo be loaded back into the content item? By the 'Automatic updates' and mappings!
Use the values of the newly created fields in the mappings of the item.

You can download the icl file from here.
Start an inspection with inspected item in iCL Filler
Let's see all this in iCL Filler. Start a new inspection with this workbook in the app.
The first thing you'll notice is, that after starting the inspection, a new page appears. It's the list of content items from which you have to select, which one you want to inspect. Choose a building.
Now you can see that the building name, address and picture are loaded to the given fields.
Let's say, you notice a mistake in some value. In the example above, there is a mistake in the address, the postal code is incorrect. Let's fix it, then finish and close the inspection.
Note, that the item will be updated only after the inspection is completed! This is for a reason:
Before completing an inspection, you can change the data in the checklist as you wish - and as the checklist allows. You can even cancel an inspection, effectively deleting the data in the checklists. Changing content items live would be a bad idea, because you could accidentally delete or corrupt data.
For this reason, changes to content items are only applied when the inspection is completed.
After completing the inspection, open iCL Portal and navigate to the content item that you've inspected and updated. If the inspection was successfully sent, the item should be updated.
Using a task to inspect a building
Until now, we've seen how inspectors can start inspections in iCL Filler and select an inspected item for the given inspection. However, as a team manager, you may want to schedule inspections for your team where you can predefine which building they should inspect. In the iCL system, you can use tasks for this.
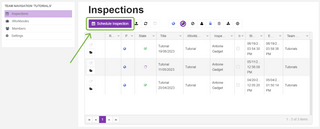
Navigate to your team on iCL Portal and click 'Schedule Inspection'.
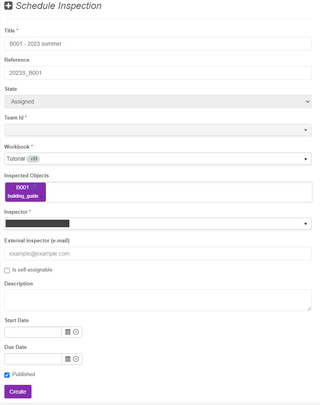
Fill the necessary fields, select the workbook and an inspected item. Assign the task to the user who should inspect the building or specify it as self-assignable.
When the task is created and published, navigate back to iCL Filler (with the correct user) and synchronize.
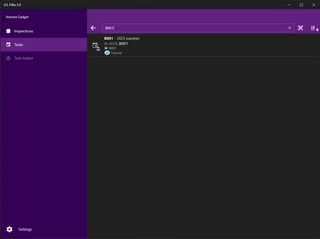
Then, navigate to the Tasks menu and select the task.
If the list of task is too long, you can search for it by its name or reference.
Start the task. Note, that this time, the page where you can select an inspected item is skipped since the inspected item is specified in the task.
Conclusion
In this guide, you got a basic understanding of content types and content items. This knowledge will help you effectively manage and organize data in the iCL system.
To learn more about content types (especially defect content types), read the next tutorial!