Creating a simple workbook
This guide introduces you to the very basics of the iCL products. It is a good starting point if you want to get started with our system. Before you can start an inspection, you need a workbook to work with. This tutorial walks you through the process of creating a new workbook from scratch, providing a basic understanding of the most important elements of a workbook as well as showing a few best practices.
Let's get started!
Creating a new workbook in iCL Designer
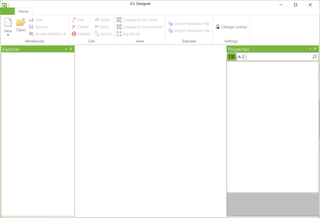
After opening the iCL Designer, you can create a new workbook by clicking on 'New' in the upper menu section.
At first, let's get the workbook a new name. By clicking on the workbook in the Explorer window on the left hand side, the Properties menu opens on the right.

You can find 3 similar properties at the top: workbook title, inspection title and name. The name specifies the internal name of the workbook, it must be unique and it identifies the workbook in the database. The users will never see the name of a workbook, they'll see the workbook title instead. The workbook title is what users can see in iCL Filler when for example they want to start an inspection with this workbook. If the inspection title is not specified, this will be used as the name of the inspection as well.
You may also noticed that the inspection title is not a simple text field like the others, but a button with a puzzle symbol on it. This indicates a scriptable property in our system. The inspection title script is used to create unique names to the inspection using some fields from a checklist. This may seem very complicated at this point, but don't worry, we will come back to this later in the guides. For now, just enter the name and title of the workbook.
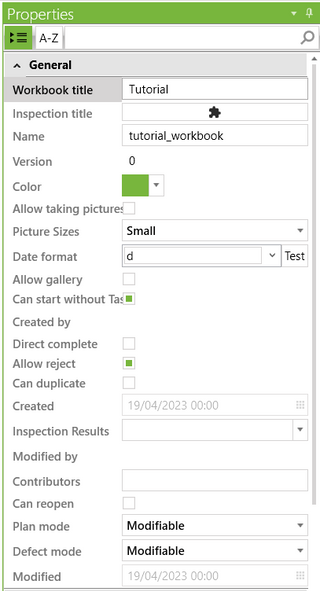
The next thing you see in the Properties window is the version. The version is 0 at the moment, since we haven't saved the workbook yet. Let's do it by clicking on the 'Save' button in the top menu bar. You can see that the version is still 0, indicating that this is the very first version of this workbook. From now on, the version is incremented automatically with each save action.
Creating a checklist
After laying the foundations for a good working environment, we can proceed to create the core of the workbook by adding checklists, filled with questions and answers of various nature.
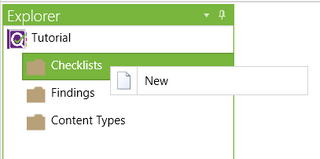
By right-clicking the folder 'Checklists' and selecting the 'New' option, a new checklist will be created.
When you click on the new checklist node in the middle, the Properties menu opens on the right where we can rename this checklist.
Let's imagine the following scenario: you are a building safety inspector, your job is to visit buildings and ensure that they meet safety standards. So let's name this checklist 'Building control'.
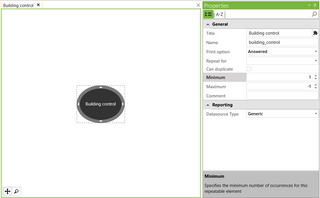
You can find a few other properties here as well, for example you can specify the minimum and maximum number of occurrences of this checklist. We set the minimum count to 1 which means the checklist will exist at least once. A maximum number of -1 means that the same checklist can be added an infinite number of times within the same inspection.
In our example this means that you can for example inspect a complex named "Maplewood Estates" where 4 houses are located - you can inspect all within one inspection by creating 4 separate 'Building control' checklists (you will actually create only 3 because the first one is automatically created, since we set the minimum occurrences to 1).
In our system, the content of a checklist is organised into chapters, and within chapters, into headlines. So we create a chapter first. To add a child node in the mindmap, hover the node (the checklist node in this case) and click the + handle on its outer edge.
Alternatively, you can select any node and hit TAB to create a child node!
With the same method, we create a headline too. In the first headline, we will gather the necessary information from the building, therefore we call it 'Building'.
And it is finally time to add a question! Questions (or often referenced as fields) are represented with purple nodes in the mindmap.
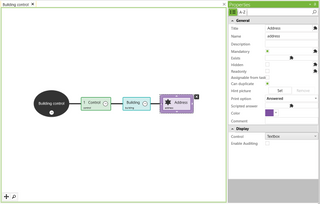
You can find a couple of properties in the Properties menu when a field is selected. You can read more about them here.
We can leave everything on default for now. You can see in the Display submenu of the Properties menu that the type of a question is 'Textbox' by default, we leave that untouched as well, as it is easiest to enter the building address in a text field.
Now you can enter the address of the building you want to inspect so there is only one thing left: we need a second question where you can indicate whether the inspected building meets the requirements or not. Let's create a second headline for this with a question 'Is the building safe?'.
The answer to this question is always either 'Yes' or 'No' so a text field in this case is probably not the best choice. Fortunately, our system has the option to add 'Yes/No' fields!

And that's it! Our first workbook is ready.
In case you got stuck somewhere, or just for comparison, you can download the finished icl file from here.
Upload workbook to iCL Portal
Now you might be wondering how you're going to do inspections using this workbook. To do so, first we have to upload the file to the iCL Portal.
Open your browser, navigate to your iCL Portal site (usually https://icl.opti-q.com if you don't use an own server) and use your login data to proceed.
Please note, that you require the permission of administrator for a team to upload workbooks.
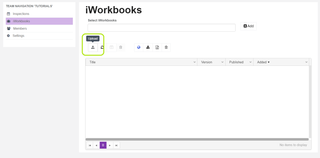
Navigate to your team where you want to upload the workbook and upload it at the 'iWorkbooks' section within your team. You can either use the 'Upload' button or drag and drop the file to the area.
Start inspection in iCL Filler
We are ready to start an inspection! Launch iCL Filler and use your login data to proceed.
Make sure that you're a member of the team where you uploaded the workbook and have at least 'Inspector' permissions.
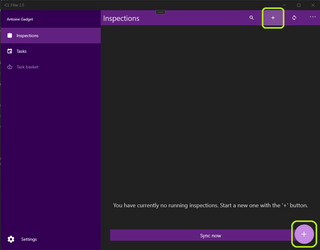
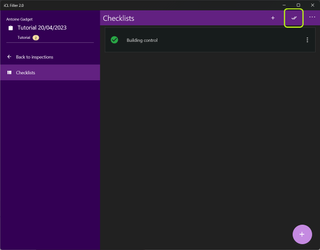
Use the + icon on the top bar or in the bottom right corner to start a new inspection and select the workbook.
After starting the inspection, you'll see the checklist.
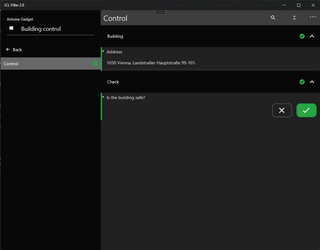
'C' indicates the chapter and 'H' shows the headline in the screenshot below. You can read more about the structure of the checklists here.

The red bar on the left hand side indicates that the question is mandatory and has not been answered yet.
Note that the left navigation bar is hidden in mobile devices and can be displayed with a left to right swipe.
Also, notice the number 2 shown in the chapter Control and the number 1 in the two headlines. These indicate the number of mandatory questions within that chapter/headline that have not been answered yet. While this indicator may not seem very valuable at the moment, mind, that checklists can get very large and complex depending on the use case. This feature helps your users navigate even the largest checklists with ease. Let's fill out the checklist with some data. After that, the bars will change their colors to green.
You can now close this inspection using one of the methods described here.
Conclusion
In conclusion, this tutorial provided you with the basic knowledge needed to create a new workbook in iCL Designer. We walked through the process of creating a checklist, chapters, headlines, and fields, and discussed various properties of each. Additionally, we learned how to upload a workbook to iCL Portal and start an inspection in iCL Filler.
We hope this tutorial has been a helpful introduction to iCL products. If you want to learn more about creating advanced workbooks and customizing your inspections, check out our other guides as well.