Getting started with plans
In this guide we will show you how you can effectively work with plans.
We are going to create a workbook from scratch, your can read a detailed tutorial about it here.
In this first part, we are going to create a workbook that allows to define a plan for a building. We will then use this plan to locate defects on it in the second part.
1. Create and configure the workbook
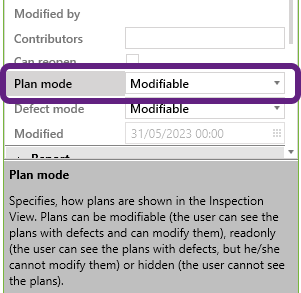
To start, open iCL Designer, create a workbook name it "building". Click on the workbook and look at the property Plan mode, which is accessible in the workbook properties and make sure that you are in the desired mode. Ensure that the property is set to "Modifiable".
2. Define the content type for "building"
We are going to define a content type "building" which will represent a building that we want to track defects for.
If you are new to content types please check out our knowledge base.
For this, we craft a JSON document where we define the fields that will be used in the workbook. In this scenario, we want a field for the "Name" of a building and its plan "Plan".
For simplicity, we are assuming here that each building has exactly one plan, which is obviously an oversimplification.
The content type should look similar to this:
  {
    "$type": "contentType",
    "name": "building",
    "displayName": "Working with Plans Building Guide",
    "canBeInspected": true,
    "titleFieldName": "buildingname",
    "titleFieldExpression": "<%buildingname%>",
    "icon": "fa-building",
    "fields": [
        {
            "$type": "contentField",
            "name": "buildingname",
            "displayName": "Name",
            "isRequired": true
        },
        {
            "$type": "contentField",
            "type": "Plan",
            "name": "plan",
            "displayName": "Plan"
         }

    ],
    "id": "81d4bd07-6f42-46e0-a458-1b1aa55995d5",
    "version": 1
  }
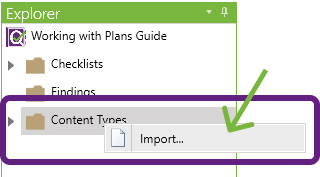
To import the file into your workbook, right click the folder named "Content Types" and choose "Import". After clicking that, the file explorer opens and you can pick your JSON file.
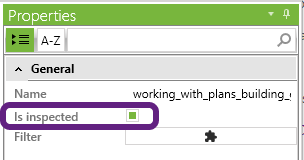
Afterwards, click on the content type and set in the properties that it is an inspected item. This will let iCL Filler know that this type is representing the object that is being inspected using the workbook.
If you want to learn more about workbooks with inspected items, read this tutorial.
3. Create a plan field
Now, we are going to create a checklist with several questions and make sure to use the Plan field.
- First, create a headline and a chapter.
TAB to create a child nodeAlternatively, you can select any node and hit TAB to create a child node!
Create a "Name" text field to save the building's name.
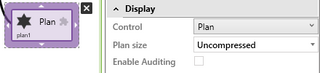
Let's set the properties of our questions. First of all, we need a field so we can later on see, upload or change the plan of a building in iCL Filler. For that, we create a plan field. For the best quality, we pick uncompressed for the plan size.
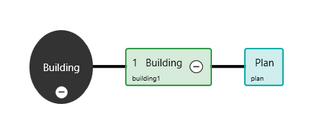
After that create a field "Building", choose the control "Content Item" and select the content type you just imported (
building).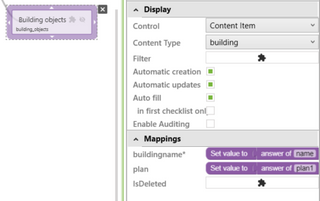
Also, we bind the created fields into the mapping with the help of blockly scripts.
The fallback content to display on prerendering
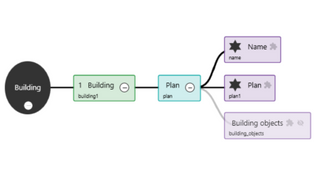
The finished product should look like this workbook:
Publish your workbook and content type
We are done with defining our workbook and content types, so upload the content types and then workbook into iCL Portal. After successfully uploading the files, you can upload your first plan.
- First, you need to upload the content typeAdmin permissions
If you cannot find the settings view, it is likely that you do not have the necessary administrator permissions.
- Afterwards, upload the workbook
1. Save a plan for a your building
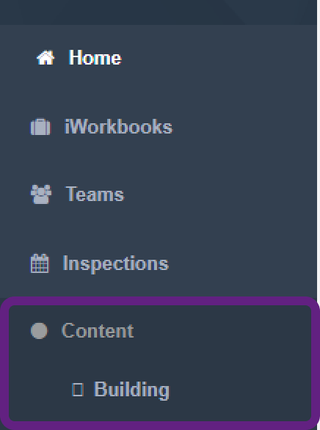
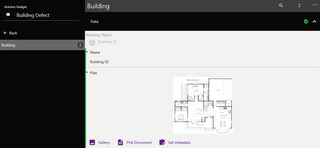
Once you uploaded your building content type, you can start to create one and upload a plan for it. A link to the list of buildings should show up in the left navigation menu under Content.
CTRL+F5 to refresh the browserIf you cannot see the navigation menu entry, you may have to refresh your browser. Hit CTRL+F5 to do so.
Navigate to the list of buildings and click the New button to create a new building.
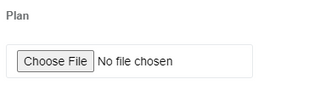
You can then specify a buildings name and plan file.
Uploading a plan is not much different from uploading an image file except that PDF documents are also accepted. Just click the choose file button and pick a file from your file explorer, or drag a file into the field to upload it.
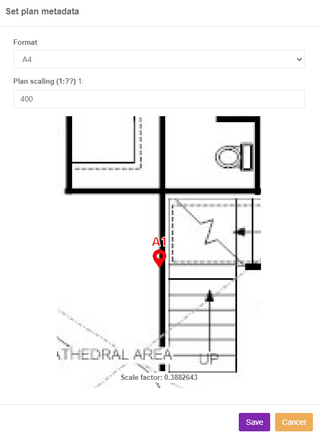
After uploading, a settings icon appears and can be pressed to insert the metadata for the plan. This is necessary as plans come in all forms and sizes (A4, A3, A0, high resolution, low resolution, ...) and we want our pins to be scaled correctly. Therefore, adjust the format and scaling so that the pin size looks good. If you do not have any information about your plan, estimate an appropriate format and scaling and check it with the rendered preview. For example, the pin of the image below is big enough to be placed on a stair.
Import a plan in iCL Filler
If the plan field is so defined in iCL Designer, you can also upload plans in iCL Filler. You can then mark locations on them in the app. Create a new inspection from the workbook early on. Then pick the content item with the plan you want to use and open the checklist.
1. Use the Plan field in iCL Filler
You can change the plan by importing a new image or PDF document. When that is done, the metadata window will pop up and must be filled.
Conclusion
Following this guide until now, we achieved to
- implement the plan related questions in iCL Designer
- insert plan data in iCL Portal
- use the plan fields in iCL Filler
If you want to learn how to keep track of defects and locate them on plans, see in this documentation.