Reports
iCL Designer provides a default report template which will automatically contain all the data of your inspections - no matter how you create or modify your workbook.
Often you will need to change the look or branding of a report. Or you even want to change what data is displayed in your reports and how it is displayed.
To give you this flexibility, iCL integrates with dox42. dox42 provides add-ins for Microsoft Word, Excel and PowerPoint and allows you create and edit your report templates with those tools.
This section introduces you to dox42 and explains how you can work with data from your workbooks to create a custom report.
Getting started with reports
1. Setting up dox42
Go to www.dox42.com and select Download in the top right

Then download the dox42 Add-Ins by accepting the terms and conditions first.
After the download is complete, extract the contents of the zip-File. It will contain the following folders:
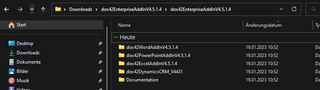
As you see, there are add-ins for Word, Excel and PowerPoint. We will only need the Word Add-In for now. So, open the folder dox42WordAddInVx.x.x.x and run the setup.exe:
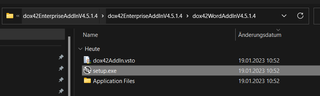
Just click through the installation wizard, since there are no important settings to specify.

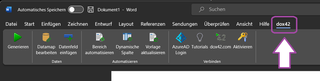
Now, to verify that you have installed the Word Add-In successfully, run Microsoft Word. You should see the dox42 tab now:
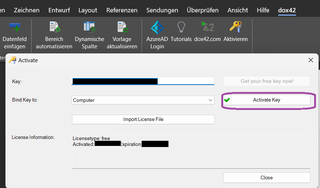
In case the buttons in the ribbon bar are greyed out, your installation is not licensed yet. To get a first free license, get a free test license from the dox42 free program Simply select Request a Free Key, enter your e-mail, name and company, and you will have your license key within minutes.
After that, click Activate in the ribbon bar and enter your license key.
You should now have a working dox42 Add-In
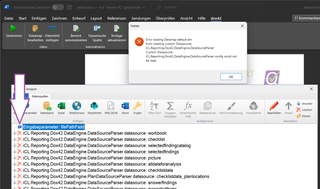
In order to edit iCL report templates with dox42, you must have iCL Designer installed too. Otherwise, opening a report template will show the following error:
In this case, install iCL Designer and run it once. When it starts up, it automatically configures the iCL DataSource in dox42. ✨
2. Generate your first report
Now that dox42 is up and running, you can generate your first report. For this, open any workbook in iCL Designer.
Go to the workbook settings and click the copy icon of the Reports

Then, paste CTRL+V into any folder and you will see the following two files:
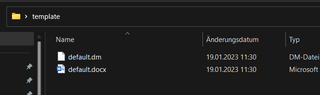
The file default.docx is the report template and defines the look of the report. For inserting data, it references data sources.
These are configured in the file default.dm, which is called data map.
It contains all the configuration details of the data sources that are used in the report.
Open the file default.docx by double-clicking it. Microsoft Word should open and show the report template.
To generate the report, hit the play button in the ribbon menu

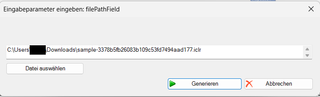
A dialog will ask you for a file path to an *.iclr file.
This is an archive that contains all the data of a single inspection.
Usually, you will go to iCL Portal and download the iclr file from a specific inspection like shown below:

Alternatively, download 💾 this sample ICLR file
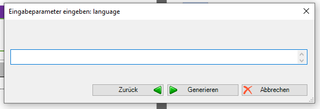
Next, it will ask you for a parameter called language. If your workbook is translated to multiple languages, here you can decide which of these languages the datasources should present the data in. If not, just leave it empty and the default language will be used.
🎉 Congratulations! You should now see your first generated report

The Data Sources provided by iCL
To make data from the iCL system available to dox42, iCL provides two data sources

1. The iCL Data Source
This is the main data source that allows you to get various information from the iCL system such as
- the inspection information (inspection id, its title, when and if it was completed, etc.)
- the data of all checklists
- the images that were taken or imported during an inspection
- related content items that were used/created during an inspection

It provides the following configuration options:
| Name | Description |
|---|---|
| Type | Defines the type of data to extract from the iclr file |
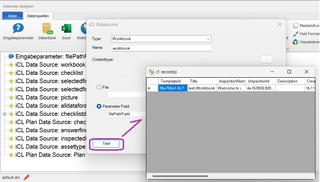
| Name | The name of this data source. You will need this when editing the report template to distinguish data sources from one another |
| Content type | This field is only enabled, when the Type of the data source is ContentItems. If so, you need to provide the json definition of the content type, of which you want to retrieve the data. Note that the content type must also be configured in the workbook and that only content items, which were used in the inspection, will be available |
| File | This allows to specify a fixed path to an iclr file. We recommend to use the Parameter Field though |
| Parameter Field | This field contains the name of a dox42 parameter that contains the path to the iclr file. Note that this should always be filePathField except for very advanced use cases. So just leave it as it is. |
You look at the data of any configured data source by clicking the Test button. It will show you a data grid with all the data provided by the currently selected iclr file.
2. The iCL Plan Data Source
The Plan Data Source allows to dynamically render plans. This allows you to not always render the same items that are located on a plan, but also to filter them. For example, you could only render defects, which have not yet been resolved.
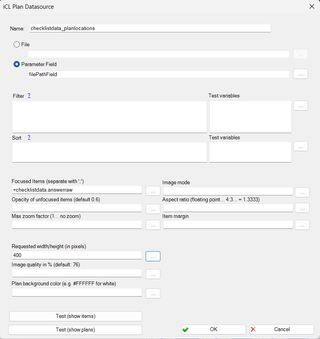
It provides the following configuration options:
| Name | Description |
|---|---|
| Name | The name of this data source. You will need this when editing the report template to distinguish data sources from one another |
| File | This allows to specify a fixed path to an iclr file. We recommend to use the Parameter Field though |
| Parameter Field | This field contains the name of a dox42 parameter that contains the path to the iclr file. Note that this should always be filePathField except for very advanced use cases. So just leave it as it is. |
| Filter | By default, all available items that are located on a plan will be rendered. However, you may want to only render open (i.e. non resolved) defects. In this case, specify a filter expression here. |
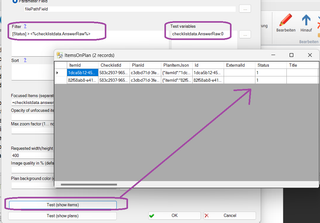
| Test variables (Filter) | When you specify a variable name in a filter, this field allows you to specify a value for them for testing. Those values are then used when you click Test (show items) but will be ignored otherwise. For example, if you reference a data source <%somedatasource.StatusColumn%> you can provide a test value of 33 as follows |
| Sort | Allows to specify in which order the items are rendered on a plan. This may be necessary in case some items overlap. You can specify quite advanced sort expressions |
| Test variables (Sort) | Same as the test variables for Filter: When you specify a variable name in a filter, this field allows you to specify a value for them for testing. Those values are then used when you click Test (show items) but will be ignored otherwise. |
| Focused Items | By default, all available items that are located on a plan will be rendered. In case you want to render one or multiple specific items, enter their identity here. The default report template uses this setting in order to render a zoomed-in picture of each individual defect that was located using a checklist. For this, it uses the expression =checklistdata.answerraw |
| Image mode | Allows to force the image to be either in portrait or landscape mode |
| Opacity of unfocused items | When rendering focused items, items that are not focused are still rendered. You can specify an opacity for them so they are easier to distinguish |
| Aspect ratio | You can specify the aspect ratio of the resulting image such as 4:3 or 16:9 |
| Max zoom factor | When a focused item is rendered, the renderer will zoom in to that item. Specify the maximum zoom factor here. In case you do not want any zoom when focusing an item, just enter 1 |
| Item margin | The minimum margin that the focused item should have from the border of the image |
| Requested width/height | As plans can be provided as vector graphics, their size can be potentially infinite. Please provide suitable image size here to get the best of document size versus image quality |
| Image quality | Even though plans can be vector graphics, the resulting image is always a PNG with a default quality of 76. You can override this here to reduce the file size or improve image quality |
| Plan background color | Often, plans may not specify a background color. You can then set one here. Most of the time, you will chose #FFFFFF |
Focused items does not only allow to specify items by specifying ids concatenated by ,
such as 82f58ab8-e41a-4f8a-b85e-9f7772b3f278,Item02,
but also supports the JSON data that defines a plan location such as:
{
    "location":"POINT(342.8304 230.9064)",
    "planId":"c3dbd71d-3fee-4d21-9a59-527a072c4111",
    "itemId":"82f58ab8-e41a-4f8a-b85e-9f7772b3f278",
    "color":"#0000FF",
    "displayText":"M02"
}
If you want to test if your filter expression works as expected, use the Test (show items) button. If present, it will respect the provided Test variables and apply the filter to the list of rendered items.
Here, for example, we define a filter that references another data source. For testing, we fake that data sources value to 0 and hit Test (show items)
The resulting data grid shows that all defects with the status 0 have been filtered as intended
The report template parameters
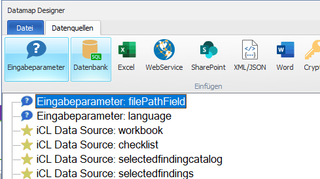
The dox42 datamap of the default report template provides two parameters that can be used to configure all iCL data sources centrally. iCL Portal will automatically provide the correct values for those parameters whenever a report is created in the system.
1. Parameter filePathField
This parameter points to the *.iclr file that contains all the relevant data of an inspection. All iCL data sources get their data from it. You can provide the file path in various ways:
Provide the path to a single file. (the default) For example:
c:\downloads\myinspection.iclrProvide a semi colon
;separated list of files. The data sources will then union all the data of those files. For example:c:\downloads\myinspection.iclr;c:\downloads\my_other_inspection.iclrIf one of the paths does exist but points to a directory, all
*.iclrfiles of that directory. For example:c:\downloads\myinspection.iclr;c:\path_to_a_folder_containing_iclr_files
If a folder path is provided, only *.iclr files that are directly in that folder will be considered. No recursive folder search is performed.
Provide a link to download an *.iclr file. This can be an http or https link like:
http://path-to-some.fileserver.net?file=myinspection.iclrURL encoded links are also supported. For example:
http%3A%2F%2Fpath-to-some.fileserver.net%3Ffile%3Dmyinspection.iclr
2. Parameter language

This parameter indicates the output language to be used by the icl datasources given the workbook is a multi-lingual one. If your workbook only contains a single language (the default), you can simply leave this parameter empty.
Otherwise your options are
user...use language the user chose to perform in the inspection in the appen...specify language explicitly e.g. 'en','de',...noteonly a single language can be specified
<%reportlang%>... using a variable. This allows you to specify a checklist field to provide you with the language for the report.
In case the language is unknown/invalid, the default language will be used
The default report template
Now, that we have an understanding of how data of the iCL system is provided to dox42, we can explain how the default report template is structured.
Checklists
The first section is the most complex one.
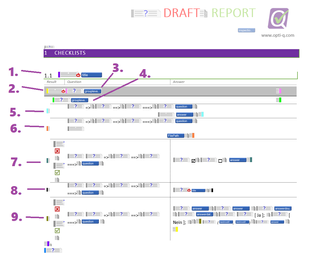
- It iterates over the
checklistsdata source to get all checklists - then for each checklist, it gets all fields values of that checklist using the
checklistdatadata source. - If we are at the start of a chapter, the chapter's title is inserted
- .. and if we are at the start of a headline, it is inserted here
Then, there is a conditional row for every field type:
- for images, signatures and sketches
- for plan locations (items located on a plan)
- check boxes
- findings
- and all remaining fields (text, multi line text, number, date, time, drop down, radio button, etc.)
Pictures
This section renders all pictures that were taken during an inspection.
Only images in the image list are considered. Images of checklists are not included.
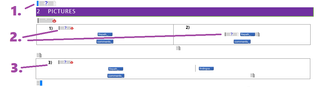
- in case images were taken
depending on how they were configured
- they are either rendered next to each other
- or each one in a separate row
Plans
- In case there are any plans available in the current inspection results (iclr file)
- they are rendered in this section
Dynamic report recipients
In the report configuration area in the workbook options, you can enter field values from the checklists as e-mail recipients or in the title field of the report name.

You specify a place holder by wrapping a field name in <% and %>. The Name of the field whose response is to be inserted is entered in the middle.
In the following example the field with the title 'Email' and the name 'email_name' exists - therefore the placeholder would have to be <%email_name%>.

Names are unique within a checklist. If a field name exists in several checklists at the same time, the response values of all existing fields from all checklists are also used and concatenated using commas.
Report creation filter
Another important property in the configuration area is 'Create if'. It allows you to define whether a report should be created or not. It is defined via a blockly script which is evaluated as the inspection is completed. If it is not defined, the report is always created.
We strongly recommend to create a hidden field in the checklist (for example, a yes/no field) where you specify whether the report should be created or not, and then use the value of that field in the report creation script without any further logic. This way you can easily test the script in iCL Filler by allowing to show hidden fields.